

Google Analytics is a crucial tool for tracking and analyzing website traffic, but managing it effectively often requires collaboration. To ensure we can provide you with the best insights and services, we need access to your Google Analytics account. This step-by-step guide will show you how to grant us access through the GA dashboard.
Step-by-Step Instructions
Step 1: Access your Google Analytics Account
Log in to your Google Analytics account using your credentials. You can access the login page here. Once logged in, you will be directed to the main dashboard.
Step 2: Go to the Admin Section
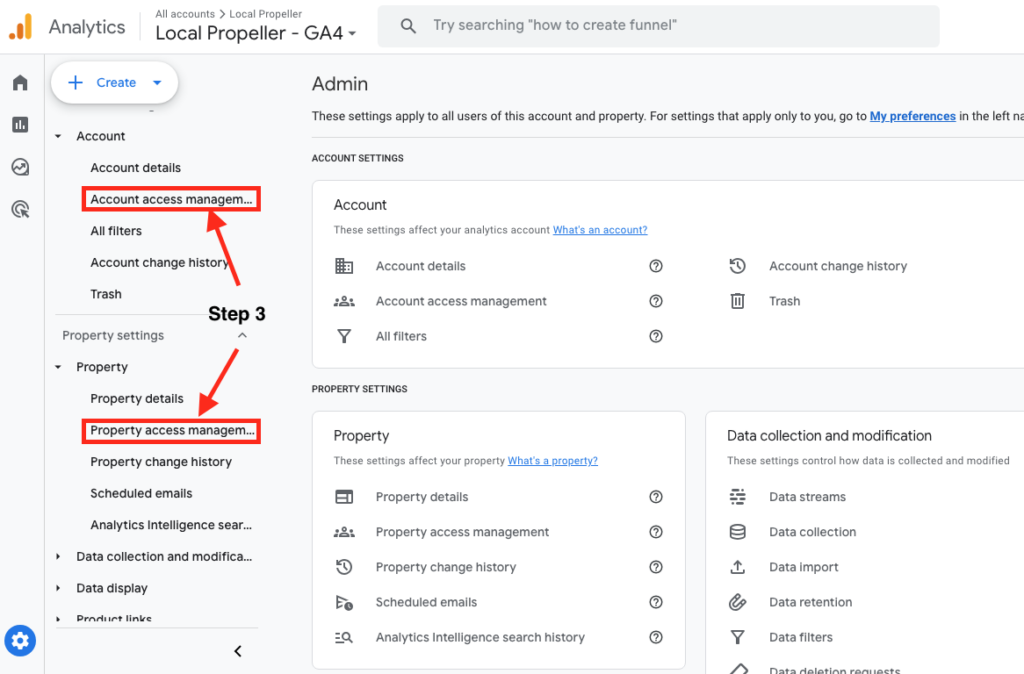
In the bottom left-hand corner of the dashboard, you will see a Gear Icon, ⚙ and it will say Admin once you hover over it. Click on it to access the administrative settings.
Step 3: Choose Account or Property Access Management
Next, decide whether you want to grant access at the account level or the property level. Account-level access allows control over multiple properties within an account, whereas property-level access is specific to a single property. Click on either “Account Access Management” or “Property Access Management” based on your needs. Typically, you’ll want to grant access at the property level.
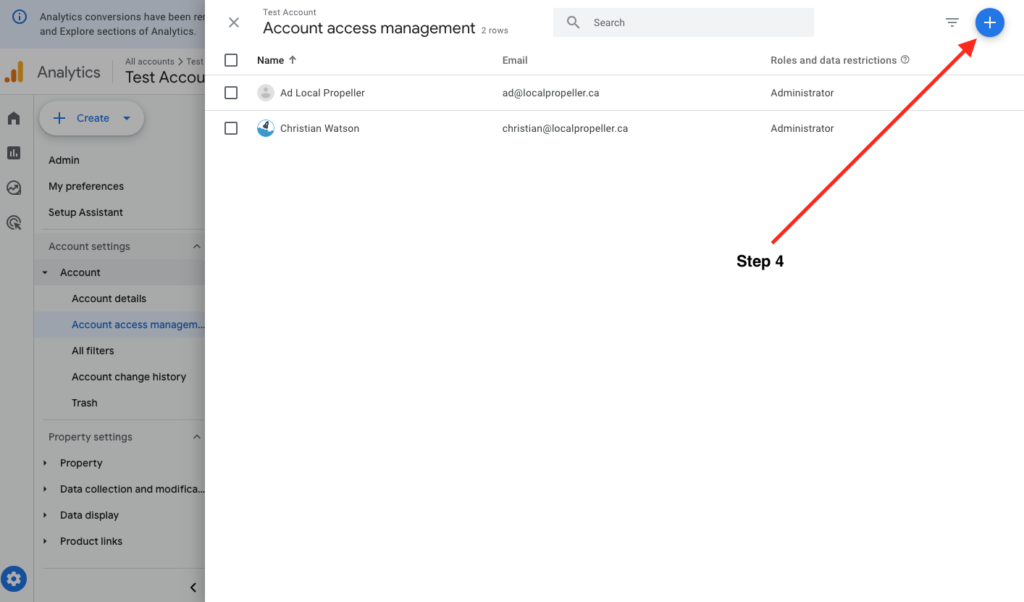
Step 4: Add a New User
For Google Analytics 4, click the blue “+” symbol located in the top right corner of the Access Management screen. This action will enable you to add new users.
Step 5: Enter the User’s Email, Assign Permissions and Add User
In the provided field, enter the email address of the person you wish to grant access to. Double-check the email address to ensure it is accurate.
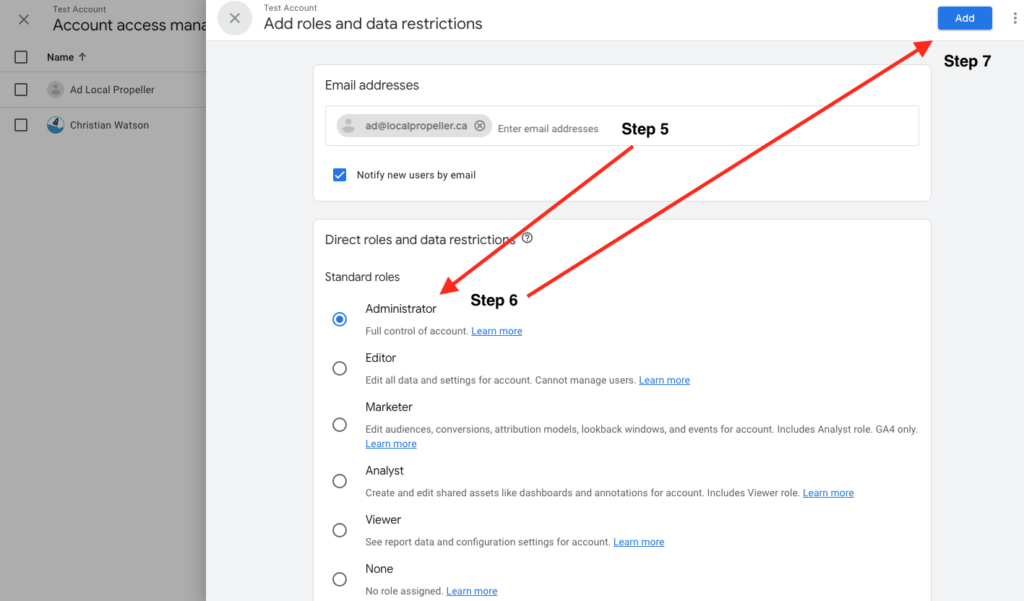
Step 6: Assign Permissions
Determining the level of access the new user will have is crucial. Google Analytics offers four roles:
- Analytics Administrator: Has full control and can manage all aspects of the account or property.
- Editor: Can make changes but cannot grant access to others or delete the account.
- Analyst: Can view data and create reports but cannot make changes or share access.
- Viewer: Has read-only access and can only view data without making any changes.
Select the appropriate role for the new user based on their responsibilities within the analytics project.
Step 7: Confirm and Add the User
Once you have selected the appropriate role for the user, click the “Add” button located in the top right-hand corner of the screen. This will begin the process of granting access, and the user will be notified via email.
Step 8: User Confirmation Email
Once the user has been successfully added, they will receive an email notification with a link. They need to click on this link to confirm and finalize their access to your Google Analytics account.
Troubleshooting Tips:
- Check Admin Privileges: Ensure you have administrative access to the account or property. Only users with administrative privileges can add new users.
- Verify Email Address: Double-check that the email address entered is correct and associated with a valid Google Account.
- Browser Issues: Try clearing your browser cache or using a different browser to see if the issue persists.
- Account Limitations: Verify if there are any limitations or restrictions on your account that might prevent adding new users.
- User Already Exists: Make sure the user you are trying to add isn’t already listed under another role or account.
- Access Management Settings: Review the access management settings to ensure there are no configurations preventing the addition of new users.
Ad Blockers: Disable any ad blockers or browser extensions that might interfere with the functionality of Google Analytics.
Support: If none of the above steps work, please reach out to us and we will walk you through the steps.