
The final step in getting G Suite up and running is to add the proper DNS records to your domain or web hosting account.
- The first step is to delete all existing MX records. You will probably have at least one MX record that looks similar to MX (10) | mail.yourdomain.com. Any existing MX records need to be deleted so they do not interfere with the G Suite MX records you will be adding.
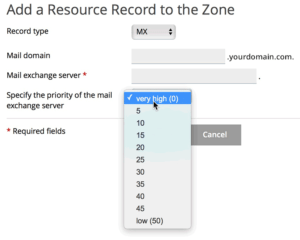
- Add the new G Suite MX records to your domain or hosting account using the table below as a guide.
MX Server Address Priority ASPMX.L.GOOGLE.COM. 1 ALT1.ASPMX.L.GOOGLE.COM. 5 ALT2.ASPMX.L.GOOGLE.COM. 5 ALT3.ASPMX.L.GOOGLE.COM. 10 ALT4.ASPMX.L.GOOGLE.COM. 10 - Note that it’s not always possible to set the priority as indicated so just choose whatever is closest – Plesk only allows you to choose between 0 and 5 so choose a priority of 0 for the first G Suite MX record (see screenshot below).
- And that’s it – once you’ve added the 5 MX records that G Suite requires you should be good to go.