Granting access to Google Tag Manager (GTM) is essential when working with a digital marketing agency like Local Propeller. It allows our team to manage tags, track events, and optimize your website’s performance efficiently. This guide will show you how to grant access to your Google Tag Manager account.
Step-by-Step Guide
Step 1: Log in to Google Tag Manager
Visit the Google Tag Manager login page and log in using your credentials.
Step 2: Select the Container
Once logged in, select the appropriate container for the website or app you want to grant access to. This is typically found in the container list on the main dashboard.
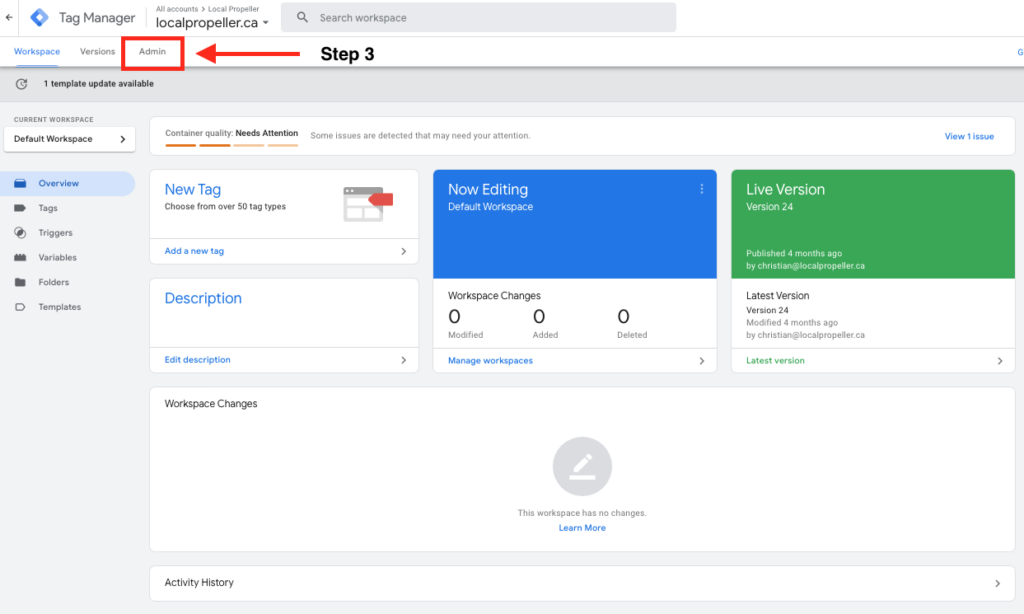
Step 3: Access the Admin Section
In the upper left horizontal menu, click on the “Admin” button to access the administrative settings.
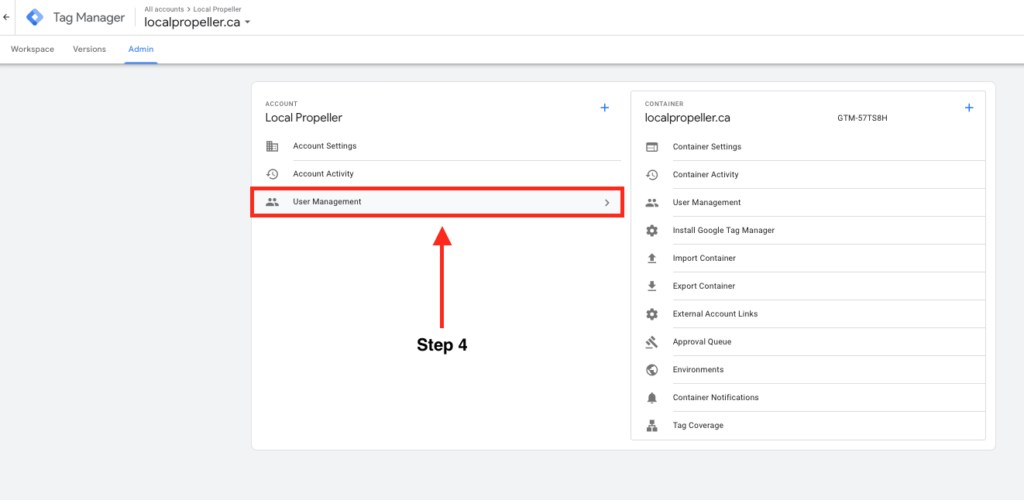
Step 4: Navigate to User Management
Under the “Account” column, click on “User Management” to manage users for the selected container.
Step 5: Add a New User
Click the blue “+” button in the top right corner of the User Management page, and then select “Add users” from the dropdown menu.

Step 6: Enter the User’s Email
In the pop-up window, enter the email address of the person you want to grant access to. Make sure the email is associated with a Google account.
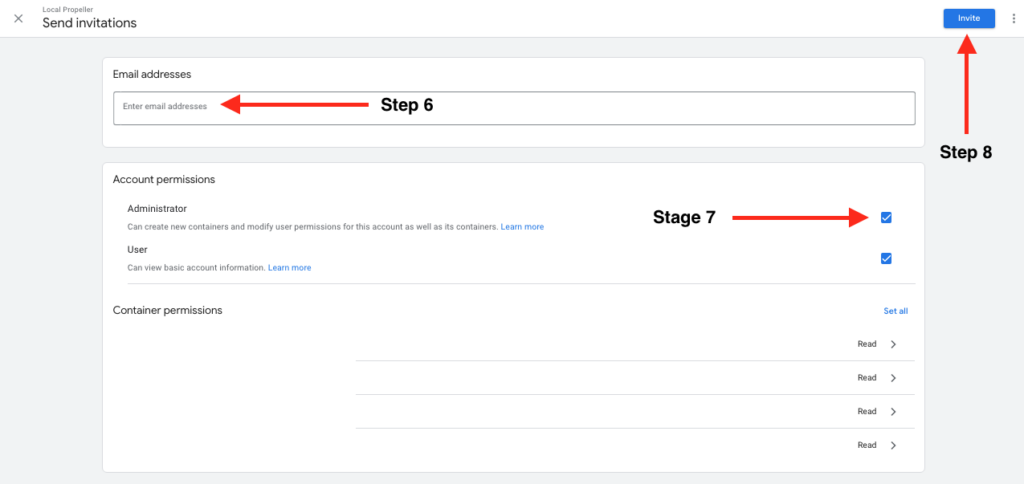
Step 7: Assign Permissions
To perform tasks necessary we request that you check the Administrator box.
Step 8: Confirm and Add the User
Click “Invite” to finalize the process. The user will receive an email invitation to accept and access your Google Tag Manager container.
Troubleshooting Tips
- Check Admin Privileges: Ensure you have administrative rights to add new users to the container.
- Verify Email Address: Double-check that the email address entered is correct and associated with a valid Google Account.
- Account Limitations: Ensure there are no restrictions on your account that might prevent adding new users.
